The importance of machine learning
We cannot emphasize enough how artificial intelligence (AI) and machine learning (ML) are transforming the world right now. In its recent review, Avenga Labs wrote an update on the current situation of the “AI state”.
→ Read about Trends in AI for business, spring 2021
Avenga Labs is not only about looking out for what is coming or what trends and technologies are emerging out there that will transform our private lives and businesses.
Avenga Labs is also a hands-on unit which works with its business partners on interesting technology research and proof of concept projects. So this time, without further ado, let’s jump right into today’s topic of how we can start to prepare an ML workstation on a gaming laptop.
A small disclaimer though, this tutorial is a tech community gift, something that we share. But of course, our data science and machine learning team deals with advanced TPU/GPU based setups both on premise, public cloud (AWS, Azure, GCP) and edge devices of many types.
→ More trends. Trends in edge AI
It’s not that we buy gaming laptops in droves because we don’t know what the industry grade options are to perform medium and beyond scale ML projects. But for smaller sets and simpler models, plus self education, we believe this tutorial can be useful for tech enthusiasts.
The previous tutorial was about a Linux workstation and received a very positive response. This time we will simplify and won’t reinstall anything by sticking close to the original software installed by the gaming laptop manufacturer. Not everyone is eager to wipe out an operating system and many feel more comfortable in the Linux environment than in Windows 10.
→ Explore Ubuntu 20.04 LTS workstation for Machine Learning enthusiasts
2021, 2022, the times of GPU trouble
A majority of us are realizing that we are now living through the deepest electronics components shortage problem era in the modern history of computing. Scalpers resell GPUs at inflated prices and GPUs can be won in lotteries. The shortage is going to last for at least two years according to most market analysts.
Recently, it seems to be easier to get access to a modern GPU by buying a ready to use gaming PC or laptop. The laptop versions of the 3xx series of the NVIDIA GPUs will probably be underpowered and many serious PC builders won’t like the components and configuration setup. But for most of the people focused on machine learning as their hobby or profession, the best option right now is to buy a ready to use gaming laptop.
NVIDIA rules the ML world and a NVIDIA GPU is the safest choice at the moment. For instance, their CUDA toolkit is NVIDIA only and many libraries depend on it for orders of magnitude for faster execution.
Of course, there are enthusiasts who embrace the revolutionary M1 processors from Apple in their new lineup and those who try to run ML on AMD GPUs, but we want to talk about simplicity here and believe that only NVIDIA guarantees peace of mind at the moment.
Unboxing experience
Gaming laptops come with Windows 10 Home and the usual set of software installed by the manufacturers, which consists of several important parts such as automated updates of proprietary firmware and drivers, as well as cooling profiles and optimization curves. So we recommend leaving those parts intact as manufacturers usually provide better support than OEMs.
And of course, there will be a lot of heat so proper cooling is paramount and we assume that the GPU is connected to a power source.
GPU drivers update
Windows 10 automatically installs safe, but not the fastest, drivers for the GPU. The more optimized versions come from NVIDIA and the best way to download them and keep them up to date is by using the GeForce Experience application. No surprises here.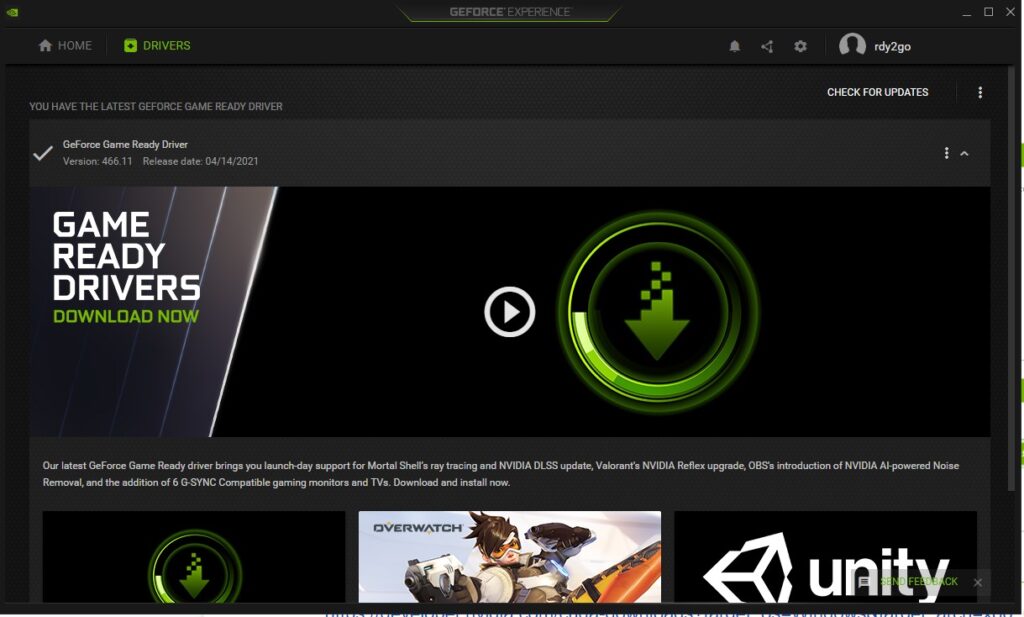
Make sure you have the latest version of NVIDIA drivers installed.
CUDA Toolkit from NVIDIA
Now let’s download the right version of the CUDA toolkit from NVIDIA. In stark contrast with our Linux guide, the process is much more colorful, very manual, and simpler.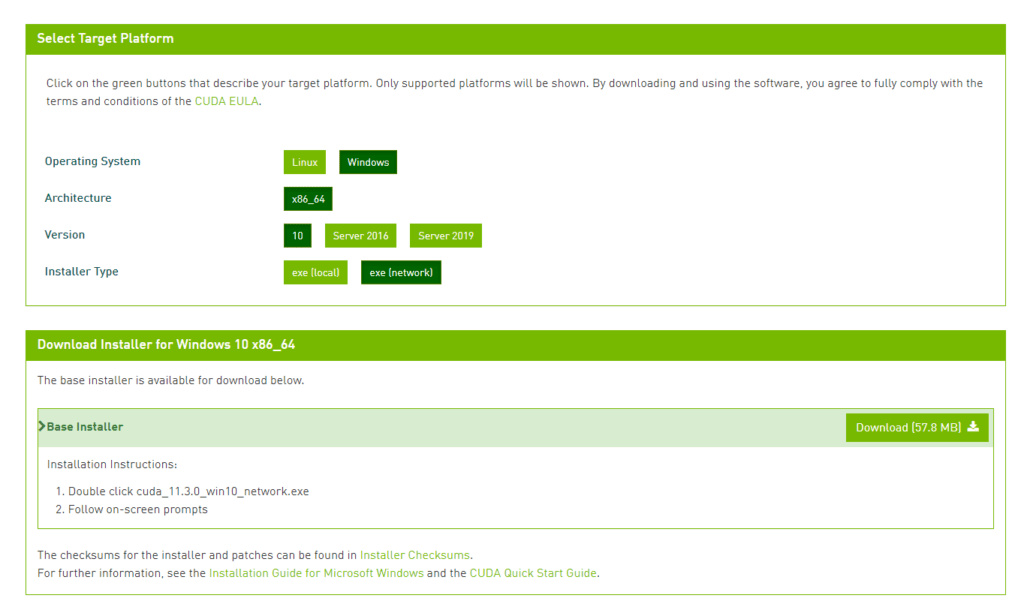 https://developer.nvidia.com/cuda-downloads?target_os=Windows&target_arch=x86_64&target_version=10&target_type=exe_network
We simply launch the downloaded file and the GUI installer starts.
There will be a note about missing components, but for the sake of this tutorial they are not required and can be installed later if needed.
Anaconda for conda
We’ll use the same path as in our Linux guide to install pytorch using the Anaconda environment. So, we visited the familiar Anaconda website.
Anaconda installation
We chose the Individual Edition.
It is more important to choose local user installation than global installation which requires administrative rights to the machine. We encountered multiple errors later on by initially choosing global installation, so we advise not to install it this way.
Then in the start menu, there will be a new item called Anaconda Powershell Prompt; so let’s launch it. 
Type:
conda update conda
This updates the conda packages and verifies the environment is working correctly.
The next step is to install the libraries using the conda installer.
conda install pytorch torchvision cudatoolkit=11 -c pytorch
At the time of writing this article, the version was 11, but at the moment you read this tutorial you may want to adjust for the later CUDA ToolKit versions that are certainly expected to come.
All looks ok, so let’s verify our installation using the terminal with Python.
The answer should be yes and the proper version of CUDA should be displayed. If not, please review the previous steps and make sure they were performed correctly.
Pytorch samples repository
Now, let’s clone the pytorch examples repository.
In case your gaming laptop did not come with git pre-installed, which will happen in 99% of the cases, please do install git before typing the next command.
git clone https://github.com/pytorch/examples
cd examples

Now the training images are being downloaded and then extracted (it will take some time even with a fast internet connection).
Start!
The time has come to finally launch our first rocket which is the training of the MNIST dataset.

Execute:
python main.py
And observe the training process.

The first run should not be used for performance measurement and, but let’s wait and see if it finishes without any errors. . . and it completed without any trouble.
Then we will use Measure-Command (equivalent of Linux time command) from PowerShell to measure the execution time.
Measure-Command { python main.py }
But first let’s make sure the machine is at maximum performance, so let’s switch it to Turbo mode. Interestingly, our later tests showed there’s no difference between Performance and Turbo in the case of this particular machine. So, we switched back to Performance mode in order to use less energy (carbon footprint is our responsibility!).
→ Avenga sustainability initiatives
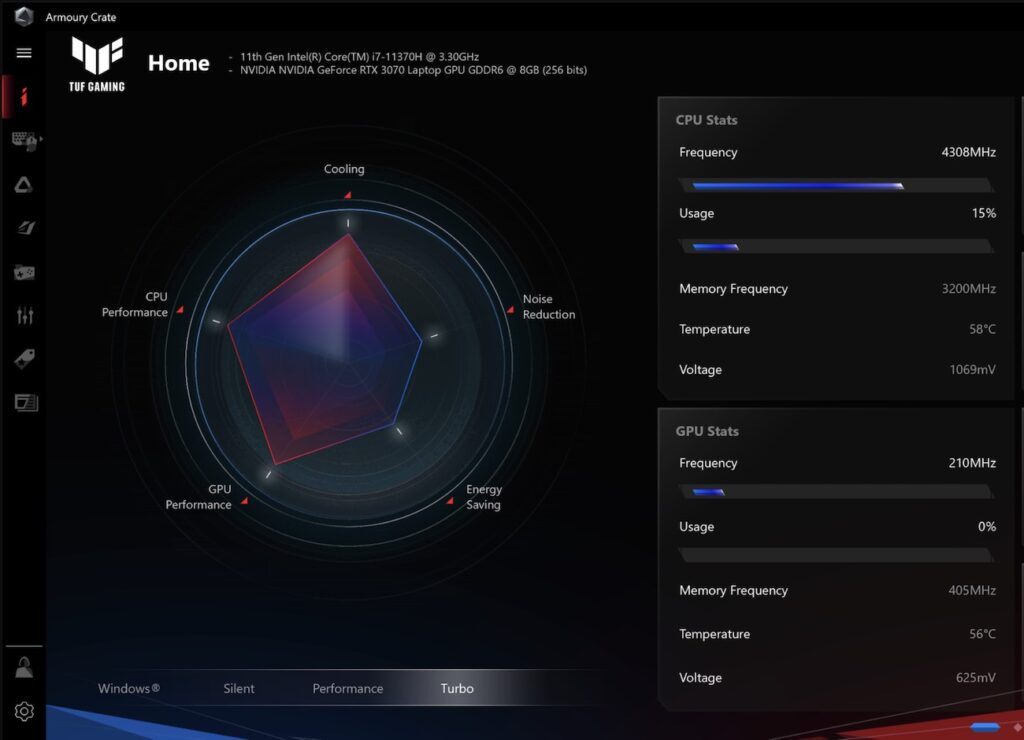
And here are the results:
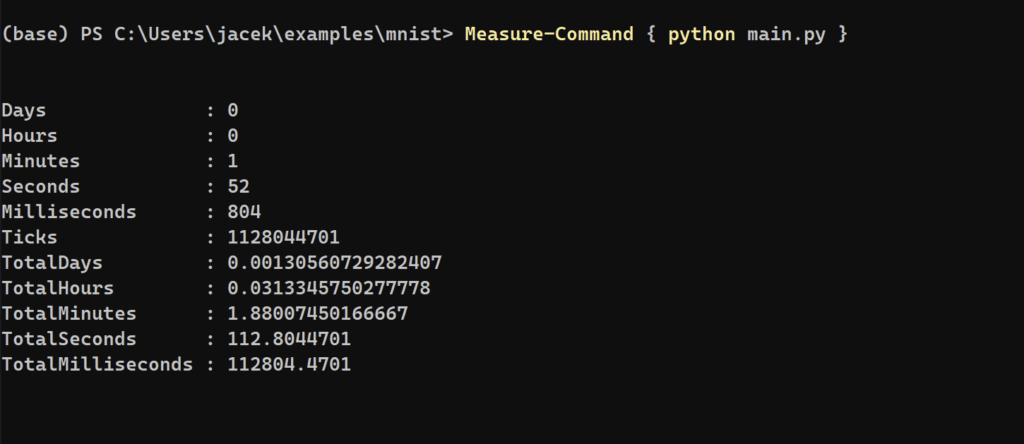
So in less than two minutes, the entire set was trained! Excellent. On my older desktop PC it took almost five minutes to complete this.
The sound coming from the laptop resembled a jet fighter engine aircraft, but those gaming laptops are prepared for that and it’s their purpose.
Wrap up
Even if you’re not a gamer, but an ML enthusiast, the gaming laptop is a great option to pursue a learning path in this area as it delivers the most power for the buck. We are deliberately not endorsing any brands, but simply recommending that you buy one with the priority of the most powerful GPU, including the GPU RAM size (8 GB or more); the CPU is less important than the GPU in these scenarios. We hope our simple and friendly gift-tutorial is an encouragement to accelerate your path in the ML area.
Feel free to join us as we are growing our ML team constantly.
→ Explore Avenga data and data science expertise
For any serious data science and ML scenarios for your business, our team is open to helping you use much more advanced software solution engineering and hardware than mentioned above.
